In this post we will show some initial setup steps in Revenue Cloud to get to a position where we can demonstrate products and prices on a sales quote.
Areas we will cover include:
- User Permissions
- Context Definitions
- Pricing Procedure
- Selling Models
- Product Catalogs
- Catalog Categories
- Product Records
- Price Books
- The Quote Transaction Line Editor
User Permissions
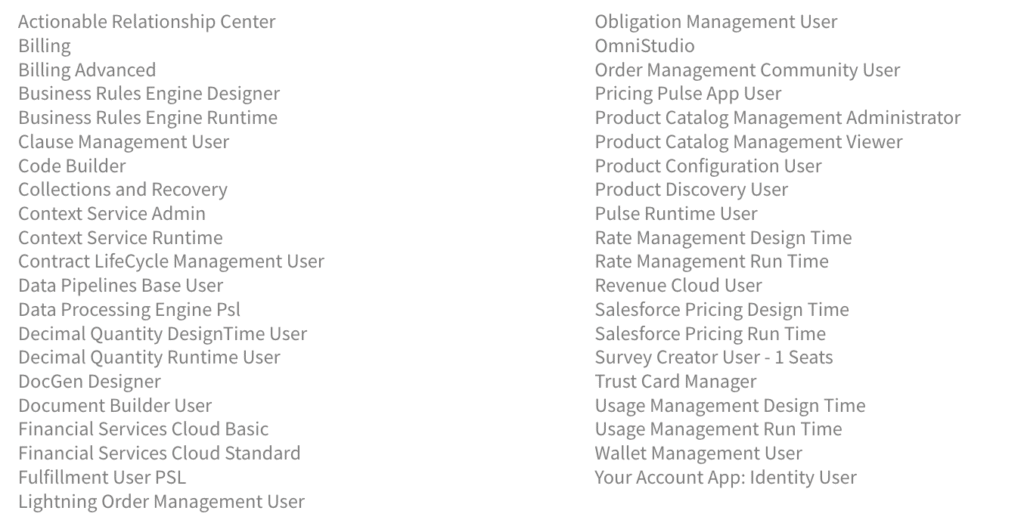
Revenue Cloud has a large number of Permission Set Licenses and associated user Permission Sets. To quickly setup Revenue Cloud the following permissions were assigned to a user record. More detailed analysis of permissions required versus user capabilities will be reviewed in a later post.
Permission Set Licenses assigned:
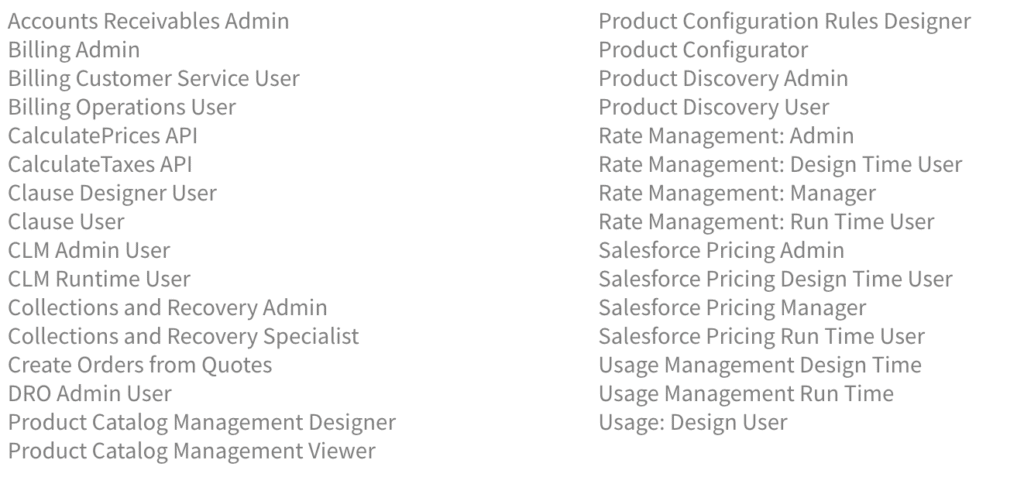
Permission Sets assigned:
When our user permission are enabled go to Setup – Salesforce Pricing Settings – turn on Salesforce Pricing.
Contexts
Context definitions are data sets used to support processes such as pricing within Revenue Cloud.
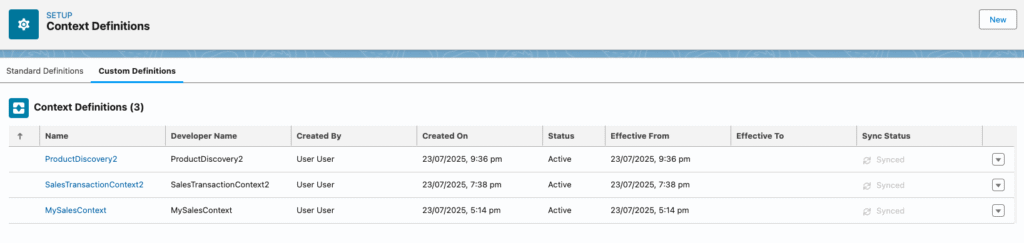
From Setup – Context Service – Context Definitions, you can see a range of initial Context definitions. We are interested here in Product Discovery Context and Sales Transaction Context. These can be used directly within our Pricing Procedures described below but we ideally want to extend these Contexts to create a Custom Definition which we can extend as we customise our quoting process.
We extend our Context Definitions by clicking on the right hand arrow and selecting Extend to then create a new custom Context Definitions for both SalesTransactionContext and ProductDiscoveryContext,
- ProductDiscovery2
- SalesTransactionContext2
Activate each of these Contexts after creation.

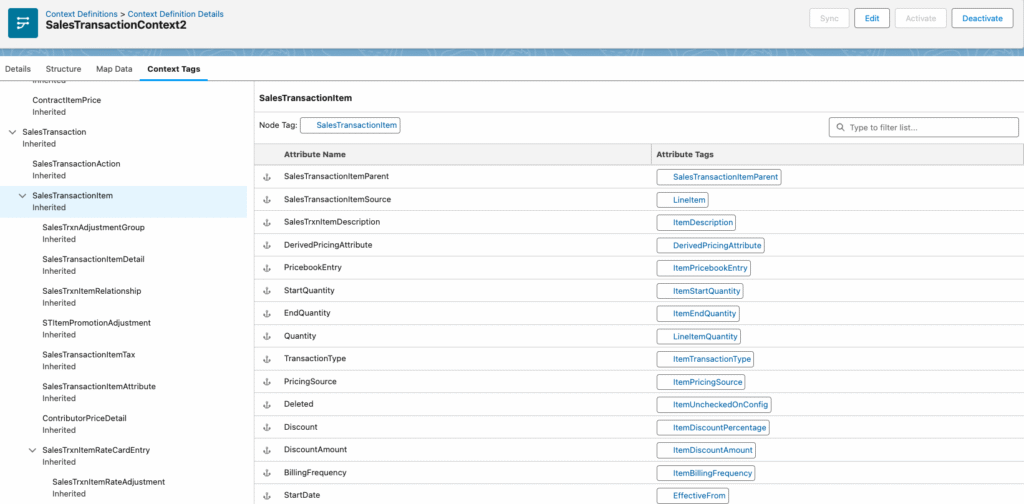
The Context Definition consists of data Nodes, and Attributes within each Node, and these are structured to support our sales transaction processes ie our quotes.
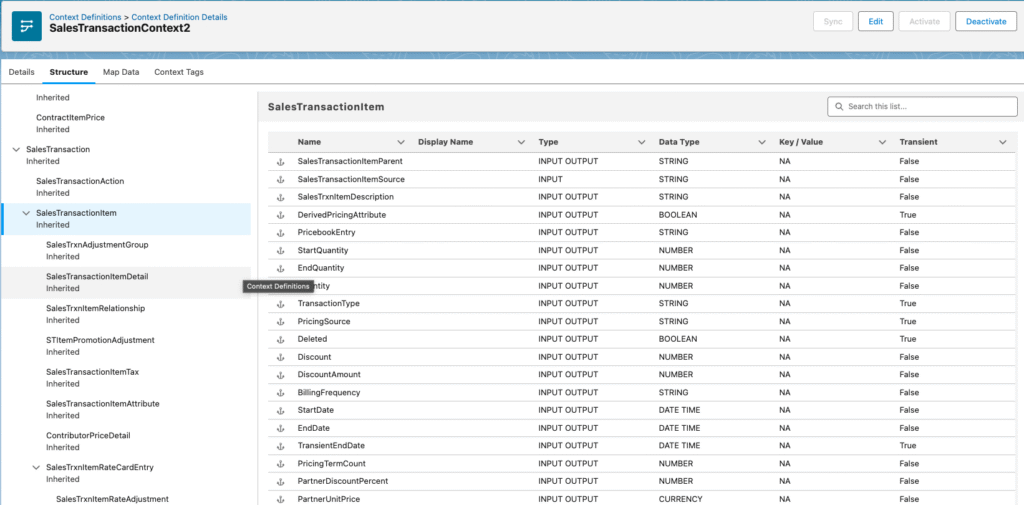
Attributes within the Context can be mapped to specific Objects and Fields in the Salesforce data model.
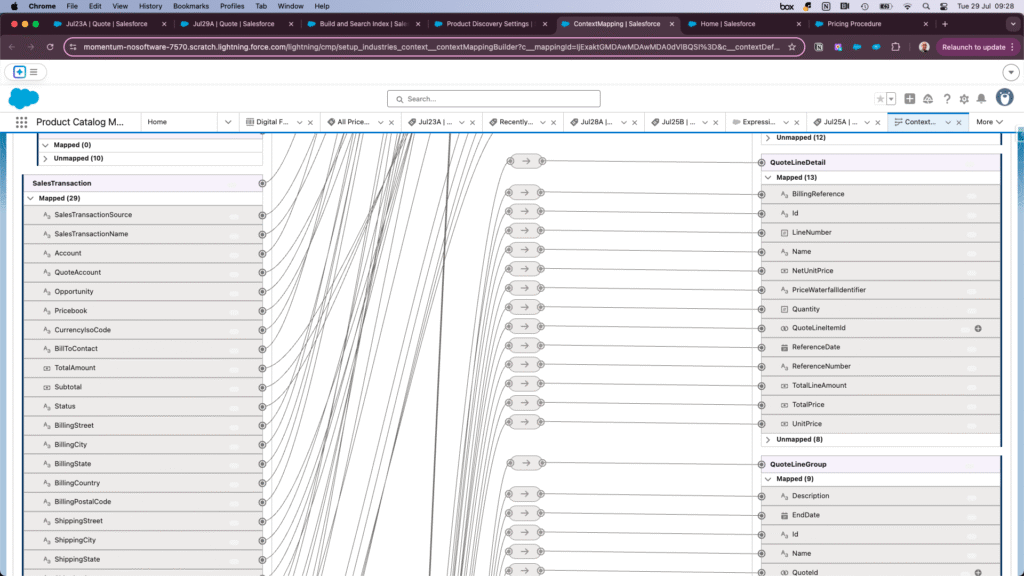
And the Attributes can be associated with a corresponding Context Tag which is then directly referenced within our Pricing Procedure (explained below), where it can be utilised to help arrive at the required product price.
Pricing Procedures
Pricing Procedures contain the logic used to determine our product quote line pricing. A Pricing Procedure is a derivative of what Salesforce generally terms an Expression Set. This is a package of elements which work through some business process logic, with a collection of inputs and a collection of outputs. In the case of Revenue Cloud quoting our inputs are things like quote line products selected, price book assigned to the quote, product quantities, discounts to be applied etc. Outputs for our quote will be things such as price and total price for each product and total price for the quote across all selected products.
To start working with Pricing Procedures we create a custom Pricing Procedure from Expression Set Templates.
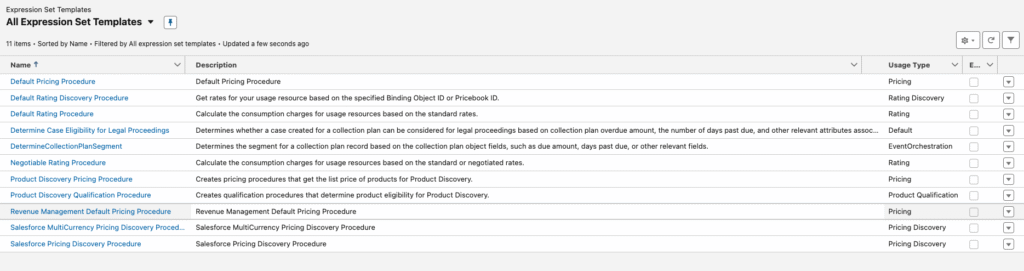
Select Revenue Management Default Pricing Procedure from the list and open it, and within the pricing procedure save as New Pricing Procedure.
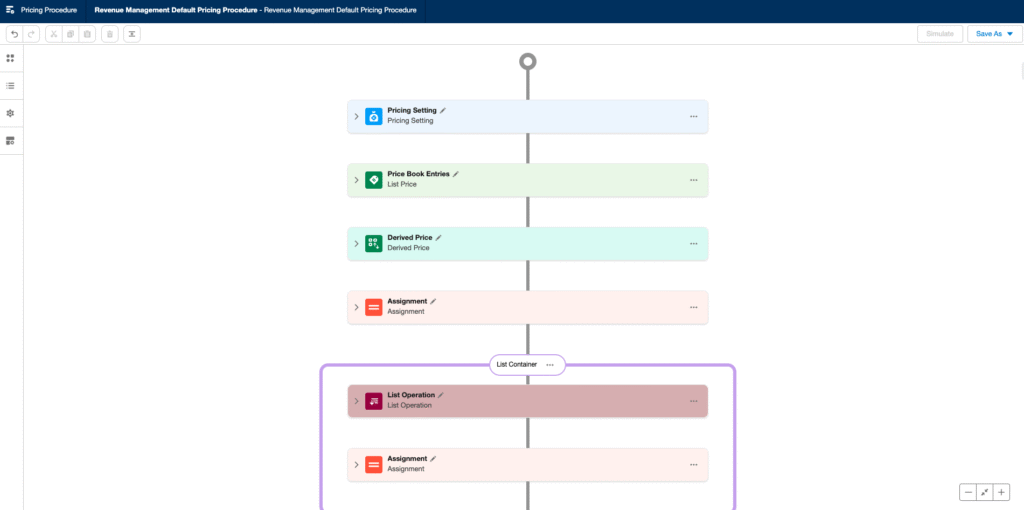
The Elements available within the Pricing procedure can be seen by clicking on the top left icon. These elements are described in more detail in the post, Salesforce Revenue Cloud Pricing Architecture

Once you have the new pricing Procedure, return to the Salesforce App Launcher, type pricing procedure in the search field, and select to get a list of the pricing procedures and select the one you have just created. Edit the Context Definition name and set to the SalesTransactionContext2 which you created above.
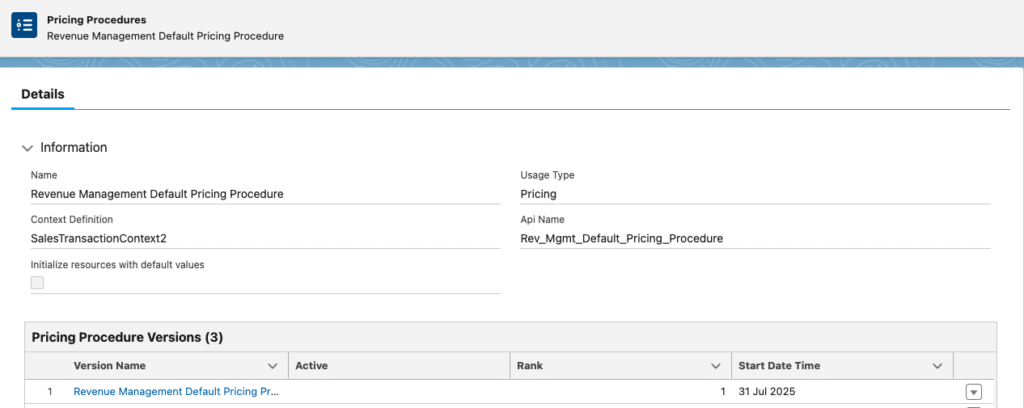
Select Revenue Management DefaultPricing Procedure from the version list and Activate.
Repeat the above for the Expression Set Template Product Discovery Pricing Procedure. Set the Context Definition for this to ProductDiscovery2 which you created above.
Now configure these pricing procedures as the default pricing procedures required for system Product Discovery and Salesforce Pricing.
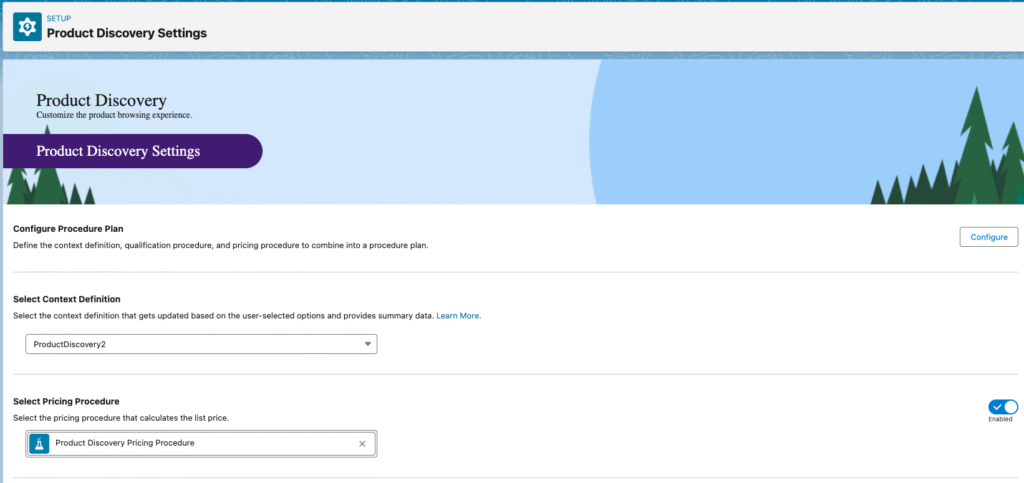
From Setup – Product Discovery Settings – Select Context Definition – select ProductDiscovery2
From Setup – Product Discovery Settings – Select Pricing Procedure – select Product Discovery Pricing Procedure
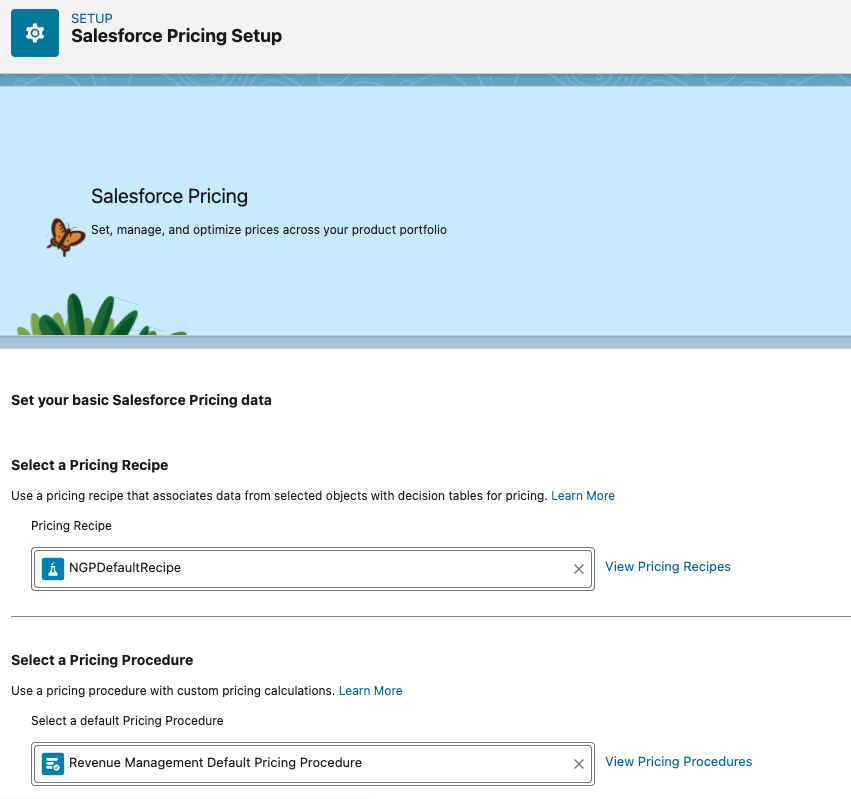
From Setup – Salesforce Pricing Setup – Select a Pricing Procedure – Revenue Management Default Pricing Procedure
Next we turn our attention to setting up a product for our sales quote. This is done within the Product Catalog Management app. Select this from the Salesforce App Launcher.
Selling Models
First we have to setup our selling models. Revenue Cloud supports different selling models against the same product. So for example a product could be sold as one-time charge, or a monthly subscription, or an annual subscription and each product can have multiple selling models associated.
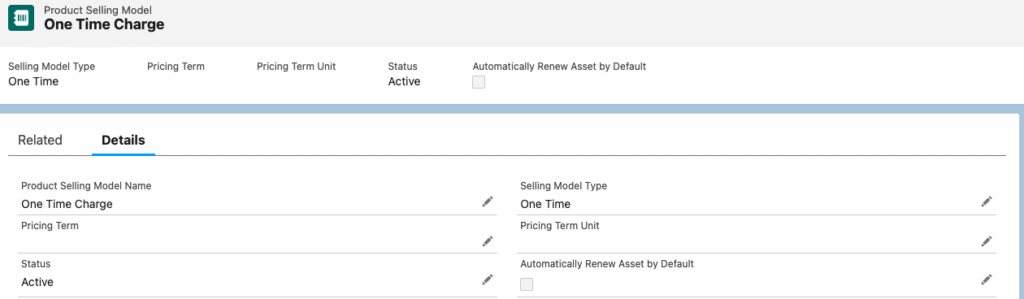
For our simple demo we will setup one product with one selling model. Select Product Selling Models from the Product Catalog Management Home page and select New and setup Product Selling Model Name of One Time Charge with Selling Model Type of One Time.
Catalogs and Categories
Next we setup a Product Catalog from where can browse and select our products. A product can be available in multiple catalogs.
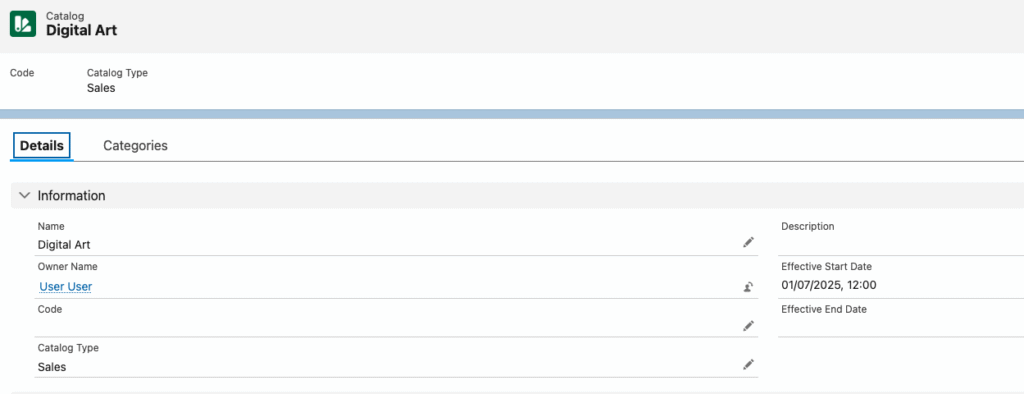
For our simple demo we will setup one catalog. From the Product Catalog Management Home page select Catalogs and select New, and setup Catalog Name of Digital Art with Effective Start Date today or in the past.
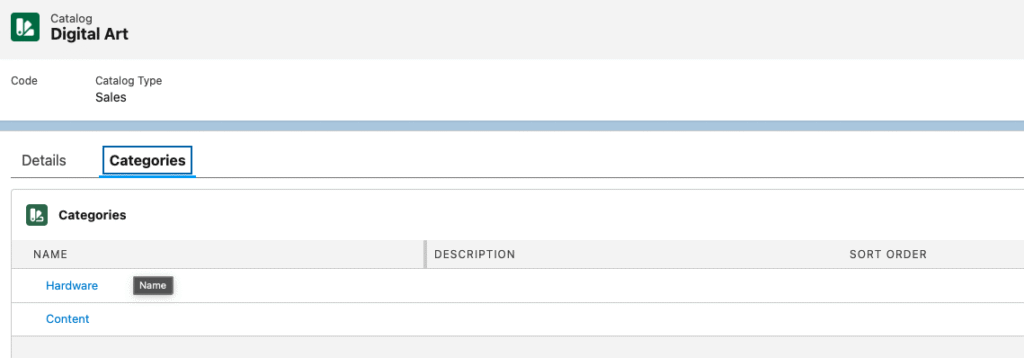
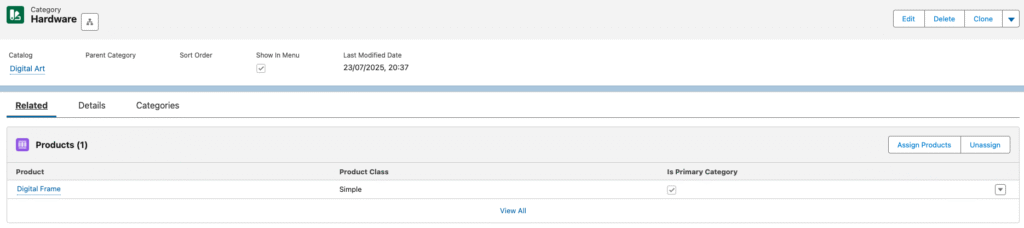
When we have our Catalog select Categories tab and Create Category to create two new Categories Hardware and Content. These Catalog Categories are what we will eventually assign our products to.
Products and Price Books
We will now create our Product to reference the above Selling Model and Catalog category.
Select Products from the Product Catalog Management Home page and select New
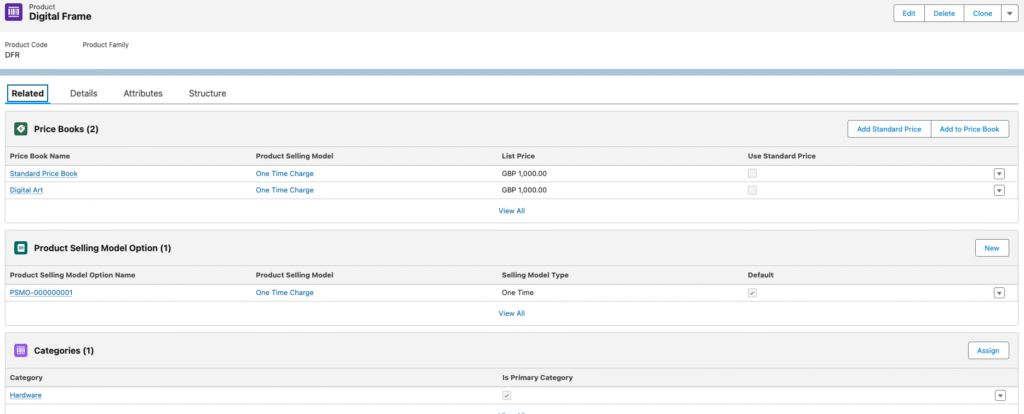
Enter Product Name of Digital Frame, check the Active box and Save.
Click on Related tab and from Product Selling Model Option select new and select One time Charge entry.
From Related tab Price Books section select Add Standard Price, then Enter list price of 1000, select product selling model of One Time Charge.
Return to Product and Price book section again, select Add Standard Price button again but this time click on x next to Standard Price Book and select New Price Book. Enter Price Book Name of Digital Art, select Active and Save, then enter List Price of 1000 and Product Selling Model on One Time Charge. This creates a custom Price Book for our digital art products.
Return to Product and from Related tab Categories section select Assign button and select Hardware Category. This will make the product available for selection from our Digital Art Catalog.
We now have our Product available for quoting with Price Book Entries, a Selling Model, and a Category defined.
To aid the browsing experience of the user when searching for products we can setup a default catalog. We want this to be our Digital Art Catalog we created above.
Go to Setup – Product Discovery Settings – Select Default Catalog – select Digital Art

System Maintenance Tasks
Having created our Products and associated details there are some system maintenance tasks which need to be performed.
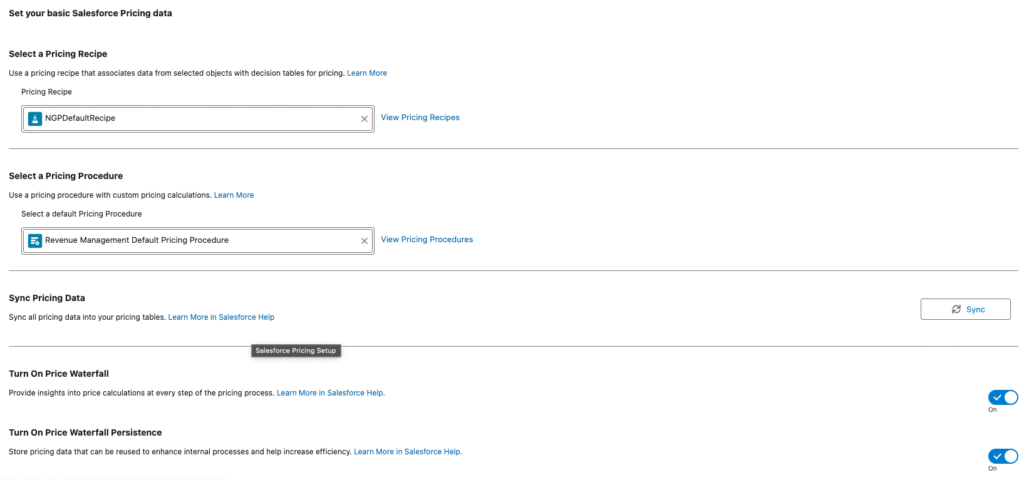
Firstly we need refresh our Pricing Decision Tables.
Go to Setup – Salesforce pricing Setup – Sync Pricing Data – select Sync button
This refreshes the necessary pricing data tables used by our Pricing Procedure and the details behind this are described in the post, Salesforce Revenue Cloud Pricing Architecture
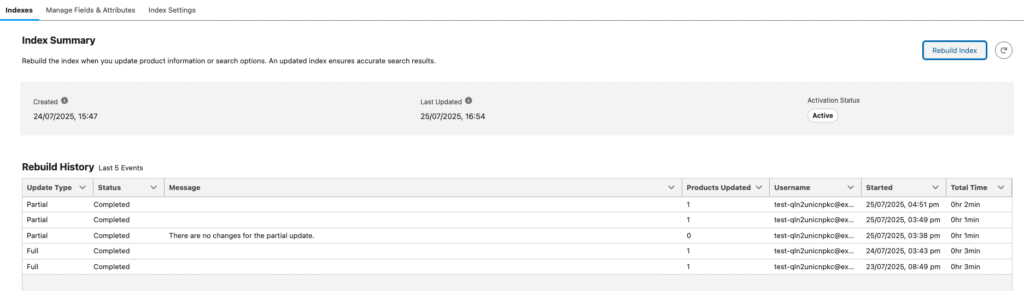
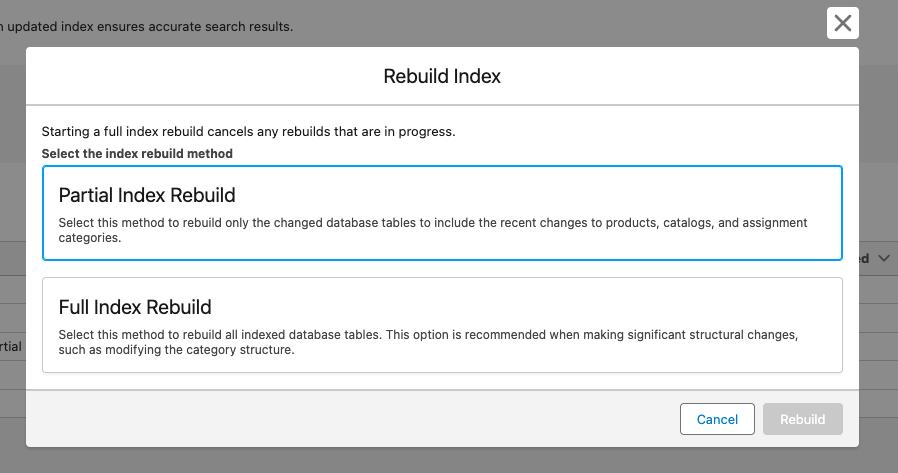
Secondly we need to refresh our Product Index tables.
From Product Catalog Management Home go to Index and Search Configuration then select Rebuild Index, Full Index Rebuild or Partial Index Rebuild.
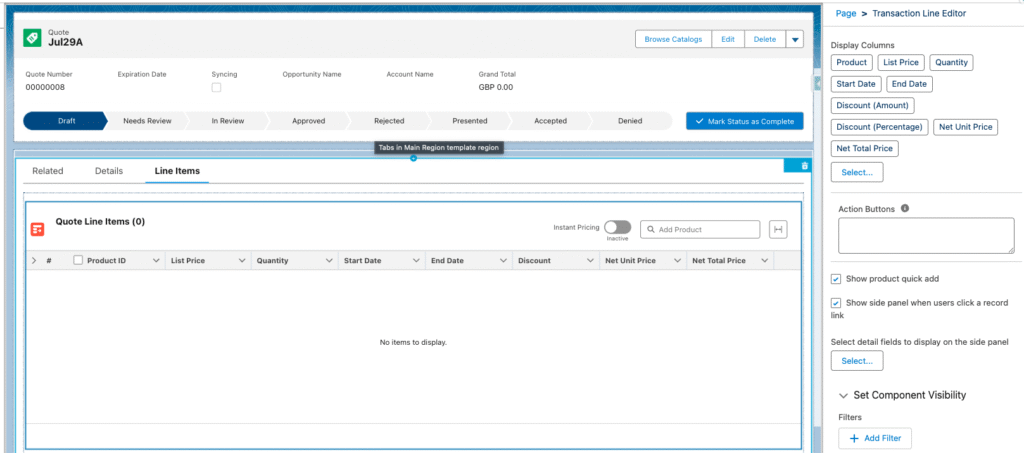
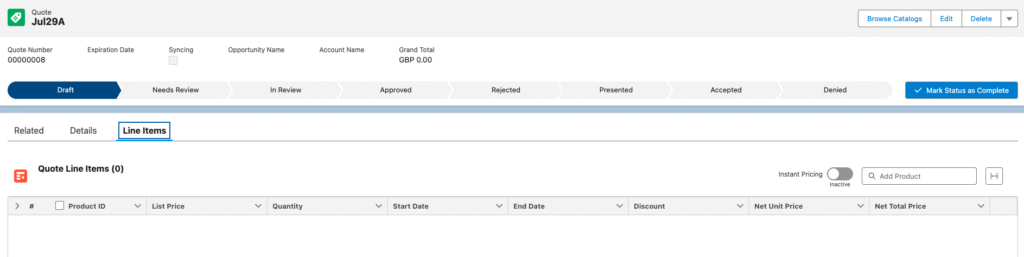
We are now ready to create our Sales Quote. For this we have available a Transaction Line Editor.
From the Salesforce App Launcher select Quotes, and New Quote button.
Provide a Quote name and Save.
You then see the Standard Salesforce Quote record with the addition of the Lines tab. The Transaction Line Editor component sits within this tab. [If this tab is missing in your Salesforce org, from the Quote page click on Setup cog, and then Edit page, and then create a Line Items tab and add the Tranbsaction Line Editor component to this tab].
The display columns can be customised within this lightning component page setup.
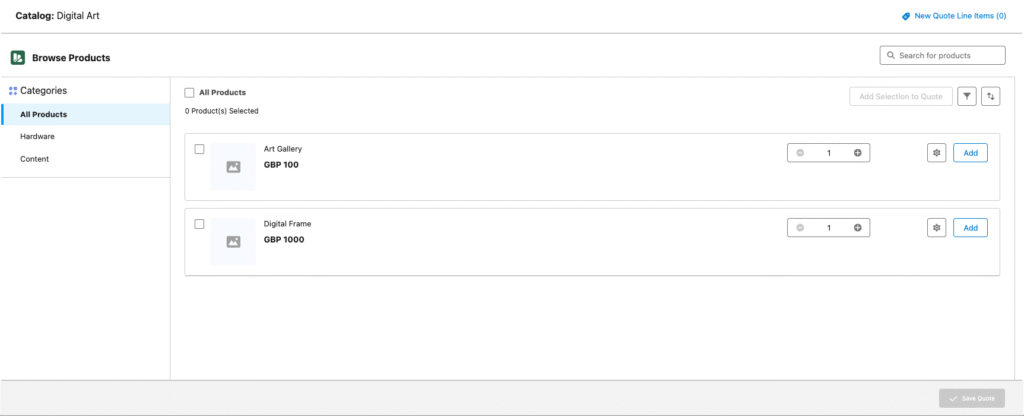
Back at our Quote page we then want to Select Browse Catalogs action button from top right. [The first time this is done you will prompted to select Price Book – Select Digital Art Price Book].
We will then see the default catalog selected, our Digital Arts catalog, and the products available. [Only one product will show in our example, Digital Frame].
Add the Digital Frame product to the Quote by clicking Add and Save Quote.
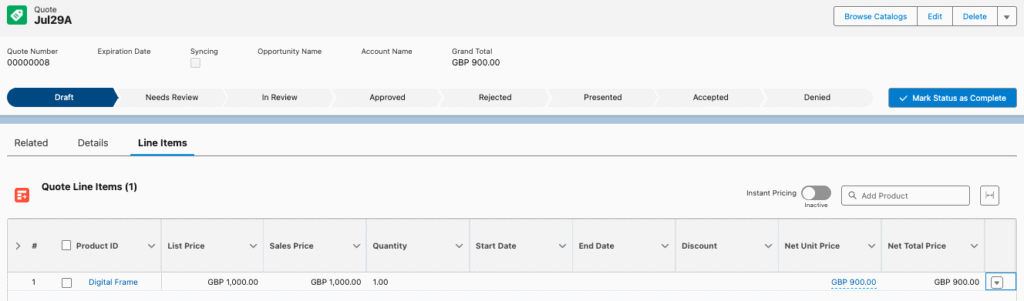
We then return to our Quote Line items and see our Product added to the quote showing List Price, Quantity, Net Unit Price and Net Total Price.
This post provides a quick run through of how to get up and running with Salesforce Revenue Cloud, showing the basic steps necessary to go from a initial clean Salesforce org to having a Product displayed and priced on a Quote.
Future posts will go into more detail on each of the above areas.